6 - Add the New String Lights

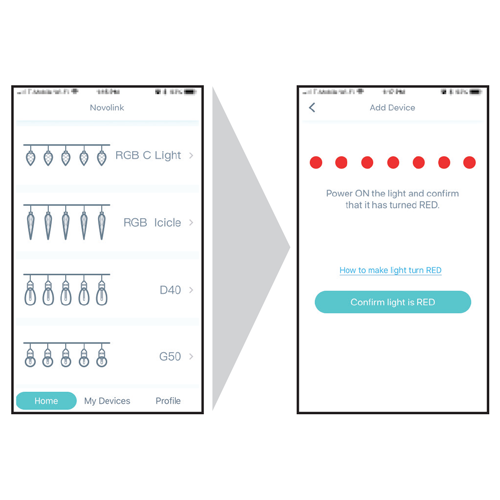
If it's not already selected, tap on the HOME button at the bottom of the screen.
Select the string light set you wish to activate. (It's important that you select your light string type, else the App may not operate the lights properly.)
Verify that the string lights are RED in color, and press the "Confirm light has turned red" button.
If the lights are another color, tap on "How to make the lights turn red" how-to, or go to setp #3 to reset the lights.
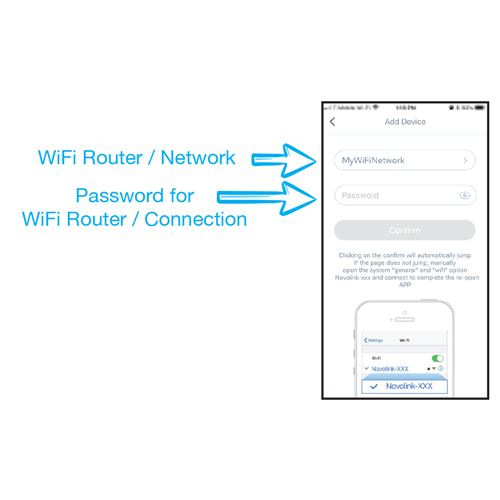
The screen will ask for confirmation of the WiFi network.
The WiFi router or network ("Device") that your smartphone is currently using will display at the top of the screen. If you would like to use another device, click the ">" symbol to enter the device name. Be exact!
Enter the password for the WiFi router/network where "Password" is displayed.
When you're done, select "Confirm".

The screen will switch to your Smartphone/Tablet WiFi Settings, showing the available Network or Devices.
Select "SmartLife_xxxx" (the "xxxx" will be a set of numbers and letters ) in the WiFi menu. This will connect the string lights to your WiFi network. (Your regular connection to the WiFi will remain unaffected.)
Return to the Novolink WiFi D-Lights app screen. The light will begin connecting. This may take a few minutes to complete.
If the connection failed to add, repeat step #3 under CONNECT THE STRING LIGHTS; reset the lights and attempt connection again.